|
The great artist and printmaker Albrecht Dürer
produced the first printed star charts in 1515 from
woodcuts. One of his charts showed all the northern
constellations; another woodcut depicted the southern ones.
The Dürer planispheres are quite scarce and were never
included in a printed book.
At the opposite extreme, Starry Night offers the fastest
and simplest way to print custom star charts.
To get an idea of how a printed star chart will look,
select Chart View from
the Settings menu. Stars are represented by dark circles on
a white background. The size of a particular circle reflects
the relative brightness of the star.
Starry Night will print the same area of sky that is
shown in the currently active window. If you want to expand
the printout to the area around the current window (in order
to fill a whole page with printout), you can do so by
holding down the Shift key while selecting the Print command
from the File menu. (On the Macintosh you can also change
the orientation of the page by selecting the Page Setup
command in the File menu.)
- Tip: If you have Onscreen Info
turned on, it will be printed at the bottom of your page,
not over top of the star chart. Onscreen Info can be
selected from the Guides menu.
Option Sets for Printing
You may want to create an option
set devoted entirely to printing, so that you can
quickly switch the program's appearance to reflect how you
want your star charts to look. For example, your Option set
for printing charts may be one in which daylight is always
turned off, and constellations, deep sky objects, star
labels, and local guides are turned on.
To create a custom option set select Options from the
Settings menu. Go through and set these options as desired.
Then, in the Settings menu, choose Save Options as...
Name your option set, and save it to the Option folder.
Once saved, you can select it by choosing Use Options from
the Settings menu any time you want to quickly switch to
those settings.
Printing Color
To print out color screen images, including the planet
maps and constellation illustrations, you can use the
Picture Selection tool to select an area of the sky that
you'd like to save as a picture. Choose the tool, then drag
it diagonally over the area you wish to select. (Double
clicking on the tool will select the entire window.) You can
copy then paste it into an image-manipulation application
where it can then be outputted to a printer.
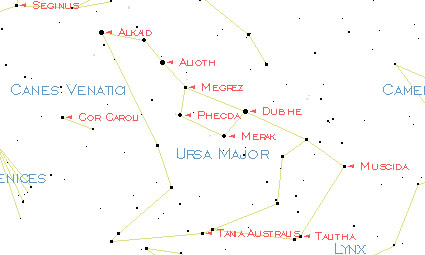
Showing Labels
If you're printing a chart with lots of labels on it,
make sure the option "Labels show arrows" is selected in the
Preferences dialog box. When this box is checked, labels
will be accompanied by arrows, which point to the labeled
object. When these arrows are on, Starry Night will activate
a "name-avoidance algorithm", which attempts to keep labels
from overlapping one another.
|

