|
|
|
One of the most useful features of Starry Night is its
ability to open multiple windows, each new window being
completely functional. This opens up many exciting
possibilities for the user. For instance, you can view an
event from several different locations at the same time, or
view a location from several different times.
Synchronizing Time and Location
Starry Night's drag-aware interface makes it easy to
synchronize the times and/or locations of multiple windows.
If two windows are open, you can drag the location flag of
one into the window of the other, and by doing so, make the
locations of both the same. The time box can also be dragged
from one window to another, thereby synchronizing the two
windows' times.
- Note: Time is always dragged as
Universal Time. On Earth, however, Starry Night will
display the time to reflect your local time zone.
Example: viewing a solar eclipse from
the Earth, the Moon, and the Sun simultaneously
Starry Night's ability to open multiple windows is an
extremely powerful feature for observing the alignment of
planets. In addition, Starry Night's interface makes it very
easy to synchronize the time of these multiple windows using
drag and drop. In this exercise, we will examine a total
solar eclipse from three viewpoints: the Earth, the Moon,
and the Sun.

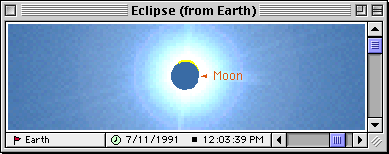
Viewing from the Earth
- Open a new window, and save it as "Eclipse (from
Earth)".
- From the Tool
Palette, set your Latitude to 21°N
- Set your longitude to 103°W (this location is in
Mexico).
- Set your date to July 11 1991 AD.
- Set your time to 12:03 PM
- Set your time step to 10 minutes.
- Using the Planet
Palette, lock on the Moon.
To view the eclipse, press the Time Forward button.

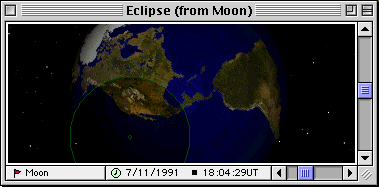
Viewing from the Moon
- Open a new window, and save it as "Eclipse (from
Moon)".
- Adjust this window's size so that you can see the
"View from the Earth" window, that you just created.
- Drag the Time Information of "Eclipse (from Earth)"
into the "Eclipse (from Moon)" window. This will
synchronize the Time and Time Flow of the two
windows.
- Using the Planet Palette, select the Moon and click
Go There. You are now located on the Moon.
- Using the Planet Palette, lock on the Earth. You
should now be able to see the shadow of the Moon (the
Penumbra) projected out onto the Earth.
If you want, use the Zoom tool and zoom up to about
1°, so that you can see the umbra. This is the tiny
area of total shadow, where, from Earth, you will see the
total eclipse of the Sun.
- Note: You may wish to hide the
clouds on the Earth in order to see the planet's surface
better. To do this, open Options from the Settings menu,
and select Planets from the popup list, then click on the
Surface Drawing folder. Uncheck Show
Atmosphere.

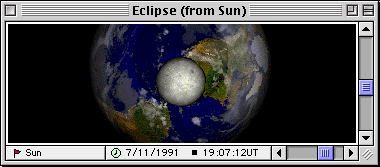
Viewing from the Sun
- Open a new window and save it as "Eclipse (from
Sun)".
- Adjust this window's size so that you can see the
other two windows.
- Using the Planet Palette, select the Sun and click Go
There. You are now located on the Sun.
- Using the Planet Palette, lock on the Moon. (Hide the
horizon if necessary.)
- Drag the Time Information of "Eclipse (from Earth)"
into the window. This will synchronize the time and time
flow of the two windows.
- Using the Zoom tool, zoom in towards the Moon until
about 17". This should give you a nice view of the Moon
in front of the Earth, with the penumbra visible on the
Earth's surface.
Now, with the three windows open, you can view the
eclipse from all three locations simultaneously. Adjust your
windows' sizes and positions so that they are all visible on
your computer screen. Then adjust the time in the "Eclipse
(from Earth)" window so that the eclipse is just beginning.
Run time forwards, then quickly drag the window's Time
information into the other two windows, synchronizing all
three of the times. The eclipse will now play out in all of
the windows.
- Note This exercise has matching
example files that can be found on the CD, in the Example
File folder, in the Exercises subfolder. If desired, open
them from the File menu.
|
